Transmit 4. It’s easy to use, but there’s a whole lot under the surface. And while we try to design apps for the majority, sometimes we throw in some power user features for the pros. As the Finnish always say, “always add a few extra blood dumplings when cooking mykyrokka for a tonttu-ukko!”
So here are 15 “secrets” of Transmit 4. Hopefully you’ll learn at least one new thing!
1. Add Custom Icons to your Favorites
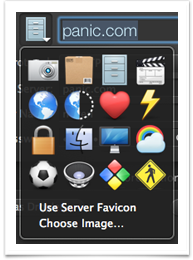 Every single one of your Transmit favorites can have its own, easy-to-recognize icon. Kenichi has provided a (beautiful) starter set of 16 — just click on the icon when editing a favorite!
 You can also load your own images. (We’ve found the Flurry icon sets from the Iconfactory to be a particularly good set.) And if you choose “Use Server Favicon”, we’ll do our best to get the icon from the server itself and slap it on a nice little label for you.
2. Show the File Count
Add a counter to your path bar to see some useful numbers. Just choose .
3. Skip Files Automatically
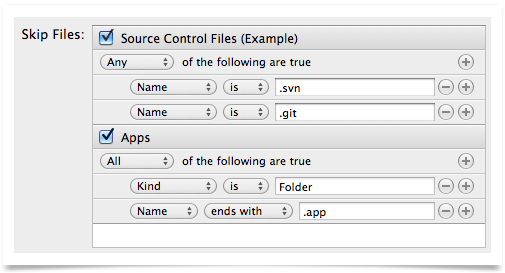
It’s a hugely powerful new feature that’s a little bit hidden: in Transmit 4, you can have Transmit arbitrarily skip files based on any number of rules. Hate .svn or .git folders? Never want to accidentally transfer your apps to a specific server? There’s lots to explore here.
4. Customize Your Favorites View
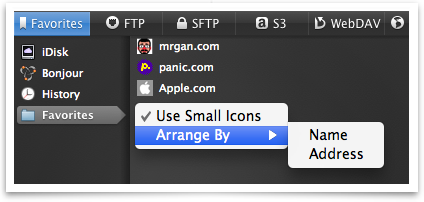
Right-click in a Favorites list to reveal a secret menu: “Use Small Icons” and “Arrange By”. The former gives you a much more compact list. The latter will allow you to perform a one-time sort of your items.
5. Try Dock Send
Inspired by the late Erik J. Barzeski (he’s alive), Dock Send is a great feature for those of you who quickly fling items to various favorites all day long.
First, edit a Favorite, and enable Dock Send.

Make sure the favorite has both a Remote Path (where your files go) and a Local Path (where your files come from) assigned to it.

Now, drag a file from your specified Local Path to the Transmit dock icon.
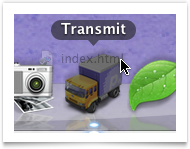
Transmit will look at the local path of the file you just dropped, then look at your favorites and say, “Hey, is Dock Send enabled for any favorite that uses this Local Path? Oh, here’s one! I’ll connect and upload this file to the specified Remote Path right away!”
Does that make sense? Based on where the file came from, Transmit picks the right place for it to go.
With judicious use of Dock Send, you can have a full suite of virtual droplets that are as easy as dragging items to the dock icon.
6. Make a Droplet
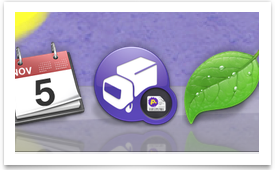
Don’t forget about droplets! Save them anywhere on your disk, send them to clients, or put them in your Dock, and get a system-wide drag target for instant uploads. Just click Save as Droplet… when editing a Favorite. (Make sure Transmit is installed on any machine using a Droplet.)
7. Quickly Copy a Web URL
First, edit your Favorite and set a proper “Root URL” for your Favorite. I.e., the base web URL that your files are served from. Then, connect to your server, right click an item, and choose “Copy URL”.
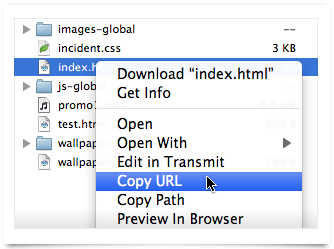
(Bonus sub-tip: right click and choose Preview In Browser… for instant preview action!)
8. Navigate in Both Sides, Simultaneously
Do your local files share the same hierarchy as your remote files? With Linked Folder Navigation, why not have Transmit automatically change both sides at once when as you navigate?
Choose , or add the Folder Linking button to your toolbar and click it.
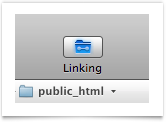
Now, every time you open a folder, Transmit will check to see if there’s a folder with the same name on the other side. If there is, Transmit will open that folder too!
Transmit 4 is pretty smart about this — if you navigate into a folder that doesn’t have a twin on the other side, that’s fine. When you return to the folder you branched from, it’ll start paying attention again.
9. Make “Get Info” Automatically Update As You Change Files
The traditional Get Info window is good for learning about a single item. But maybe you want to Get Info on a whole bunch of things, and you don’t want to open 4,000 windows.
No problem. It’s easy to create a Get Info “Inspector” — just hit ⌥⌘I (Option-Command-I).
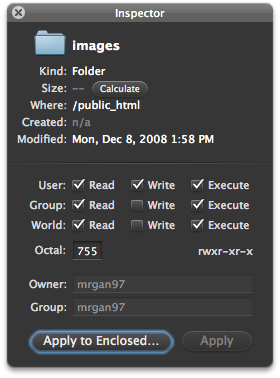
Now, as you change files, Get Info will automatically update.
10. Learn Some Drag and Drop Tricks
Did you know you can drag files into all areas of the path bar?
- Dropping on the folder icon will add a folder to Places for quick access.
- Dropping items onto any component of the path bar will either move or transfer those item to that folder.
- Lastly, dropping a folder into the empty space on the right (or the local/remote switch button) will change Transmit to that folder.

There’s also spring-loaded folders. When dragging, simply hover over a folder and watch it spring open allowing you to drill down the folder hierarchy mid-drag. The file lists also trigger activation, so dragging items from other applications or another Transmit window is quick and easy. While dragging pause over a file list for a second and Transmit will activate the window/application allowing for seamless drag and drop without obstruction.
Another useful AND “secret” feature is the ability to drag re-order file operations in the Transfers list. Simply grab a top-level row and drag it to a new location in the list, boom, instant prioritization of your transfers.
11. Show Folders Above Files
It’s totally possible. (This is a Windows thing, yeah?)
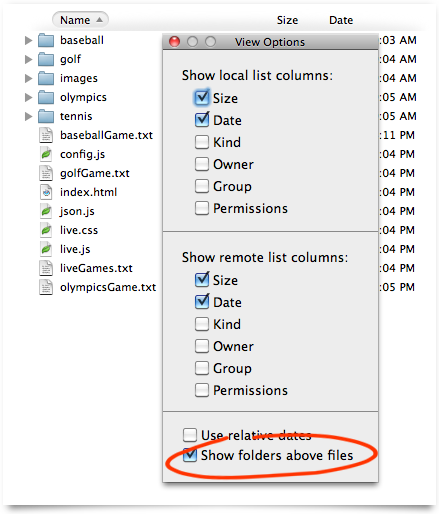
Choose , then check Show folders above files.
12. Zip Files Directly On an SFTP Server (And More)
If you’re connected via SFTP, and are connected to a Unix server, it’s super simple. Don’t waste a transfer!
Select an item, and choose . If you click on the little action button, we’ve pre-loaded “zip” and “unzip” shortcuts, but you can execute any UNIX command.

13. Hide iDisk/Bonjour Favorites or Prevent Transmit Disk from Opening Windows
Got your Terminal window open? This one’s for experts only.
If you want to prevent the Finder from automatically opening Transmit Disks after mounting, paste:
defaults write com.panic.transmit OpenMountedFinderWindow -bool NO
defaults write com.panic.transmitmenu OpenMountedFinderWindow -bool NO
If you want to hide the Bonjour collections from Favorites, paste:
defaults write com.panic.transmit RendezvousEnabled -bool NO
defaults write com.panic.transmit ShowiDiskInFavorites -bool NO
Hope these help somebody.
14. Get Image Dimensions using Quick Look
It’s a minor point, but worth mentioning — if you use Quick Look on any image, local or remote, we’ll put the dimensions in the title bar.
15. Make a Local/Local or Remote/Remote Window
This one is pretty fundamental, but seems to slip by some — it’s possible to set both sides of Transmit’s split window to the same view.
Just click the tiny icon on the right side of the path bar to toggle between a local or remote view.

If you want to manage your local hard drive with the ease of Transmit, or if you want to easily fling a file from one server to another, there’s no better way.
16. Bonus Tip! Customize Keyboard Shortcuts
It’s possibly one of the greatest hidden features in Mac OS X, and works for almost all apps.
Want, say, to have a keyboard shortcut?
First, open System Preferences ▸ Keyboard, and click Keyboard Shortcuts.
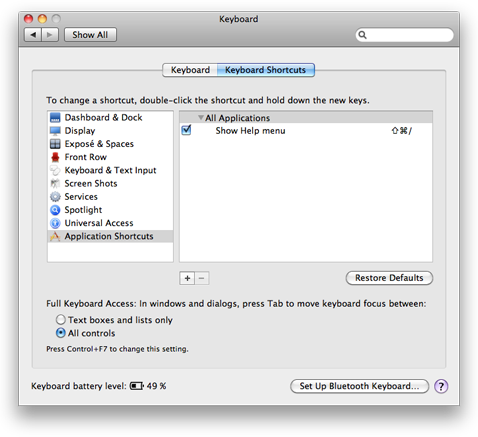
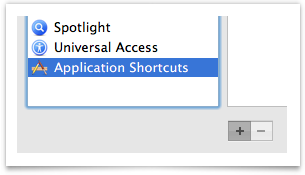
Now, select “Application Shortcuts” on the left, and click the “Plus”  .
.
From the pop-up menu, choose Transmit.

Now, let’s type in “Send SSH Command…”, and give it the shortcut of our choosing!
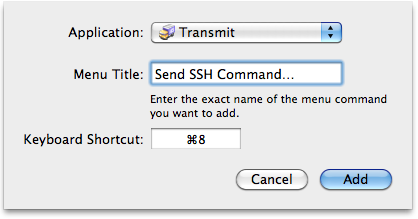
(The ellipsis is important! If the menu item has one, you need one. Hit Option-Semicolon to type it.)
That’s it! Without even having to relaunch Transmit, your shortcut has been added. One note: this can be tricky for dynamic menu items that change based on what’s selected — you’ve gotta match the name exactly.
Enjoy the hot tips!


